

uniapp
uniapp
HBuilderX创建
在点击工具栏里的文件 -> 新建 -> 项目(快捷键Ctrl+N),选择uni-app类型,输入工程名,选择模板,点击创建,即可成功创建。
uni-app自带的模板有 默认的空项目模板、Hello uni-app 官方组件和API示例,还有一个重要模板是 uni ui项目模板,日常开发推荐使用该模板,已内置大量常用组件。
vue-cli创建
使用这个一般就是要用到TS,因为HBuilderX对TS的支持目前没有达到需求,存在一些问题不能识别,所以使用vscode 用命令的形式创建,这一部分的详细安装看官方,主要是还得安装几个插件
全局安装 vue-cli
1 | npm install -g @vue/cli |
创建uni-app
使用正式版(对应HBuilderX最新正式版)
1
vue create -p dcloudio/uni-preset-vue my-project
复制代码
使用alpha版(对应HBuilderX最新alpha版)
1
vue create -p dcloudio/uni-preset-vue#alpha my-alpha-project
复制代码
使用Vue3/Vite版
创建以 javascript 开发的工程(如命令行创建失败,请直接访问gitee下载模板)
1
npx degit dcloudio/uni-preset-vue#vite my-vue3-project
复制代码
1
npx degit dcloudio/uni-preset-vue#vite-alpha my-vue3-project
复制代码
创建以 typescript 开发的工程(如命令行创建失败,请直接访问gitee下载模板)
1
npx degit dcloudio/uni-preset-vue#vite-ts my-vue3-project
复制代码
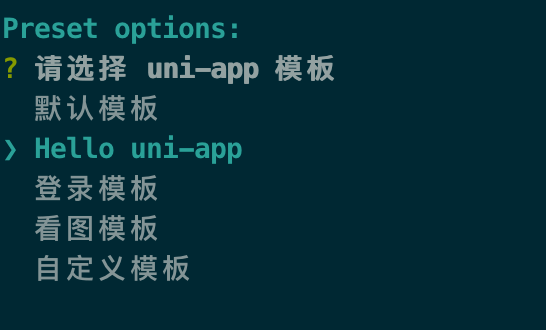
此时,会提示选择项目模板(使用Vue3/Vite版不会提示,目前只支持创建默认模板),初次体验建议选择 hello uni-app 项目模板,如下所示:
注意
- Vue3/Vite版要求 node 版本
^14.18.0 || >=16.0.0 - 如果使用 HBuilderX(3.6.7以下版本)运行 Vue3/Vite 创建的最新的 cli 工程,需要在 HBuilderX 运行配置最底部设置 node路径 为自己本机高版本 node 路径(注意需要重启 HBuilderX 才可以生效)
- HBuilderX Mac 版本菜单栏左上角 HBuilderX->偏好设置->运行配置->node路径
- HBuilderX Windows 版本菜单栏 工具->设置->运行配置->node路径
安装插件
- uni-create-view:快速创建视图与组件
- uni-helper:代码提示
- uniapp小程序扩展:鼠标悬停查看文档
安装TS
1 | pnpm i D @types/wechat-miniprogram @uni-helper/uni-app-types |
配置tsconfig.json
1 | { |
设置文件关联
打开设置,搜索文件关联
设置”项”为 manifest.json “值” 为 jsonc 这个可以写注释
设置”项”为 pages.json “值” 为 jsonc 这个不能写注释
uni-ui
HBuilderX:直接在官网导入即可
npm:
vue.config.js文件 ,增加@dcloudio/uni-ui包的编译即可正常1
2
3module.exports = {
transpileDependencies:['@dcloudio/uni-ui']
}准备 sass
1
2npm i sass -D 或 yarn add sass -D
npm i sass-loader@10.1.1 -D 或 yarn add sass-loader@10.1.1 -D安装 uni-ui
1
npm i @dcloudio/uni-ui 或 yarn add @dcloudio/uni-ui
配置easycom
1
2
3
4
5
6
7
8
9
10
11
12
13
14
15// pages.json
{
"easycom": {
"autoscan": true,
"custom": {
// uni-ui 规则如下配置
"^uni-(.*)": "@dcloudio/uni-ui/lib/uni-$1/uni-$1.vue"
}
},
// 其他内容
pages:[
// ...
]
}
安装uni-ui的TS支持
@uni-helper/uni-ui-types
npm地址:https://www.npmjs.com/package/@uni-helper/uni-ui-types
安装
1 | npm i -D @uni-helper/uni-ui-types |
配置 tsconfig.json,确保 compilerOptions.types 中含有 @dcloudio/types 和 @uni-helper/uni-ui-types 且 include 包含了对应的 vue 文件
1 | { |
封装拦截器
Promise封装
1 | class API { |
uni.addInterceptor封装拦截器
1 | const BASE_URL = "http://localhost:3000" |
自定义导航
修改样式、关闭默认导航
1 | "navigationStyle":"custom", |
由于不同的机型手机头部到安全区域的距离有一些差距,需要借助uniapp提供的方法来获取
1 | const {safeAreaInsets} = uni.getSystemInfoSync() |
注意:Vue3版本使用Vue - Official(当前2.2.10有误)时需要关掉建议或使用老版本,否则会提示没有必要的报错,小程序的组件他没法识别